

Updated on: 2026-09-15
Dining area lighting is one of the fastest ways to improve comfort, style, and daily usability. The right dining area light fixtures can make meals feel warmer, support task lighting, and enhance the architectural details around your table. A well-planned setup also helps you avoid glare, shadows, and uneven brightness. This guide covers practical selection rules and an efficient planning process for lasting results.
1. What to Focus on When Choosing Dining Lighting
3. Build a Layered Lighting Plan
4. Use Dimmers and Correct Bulb Selection
5. Step-by-Step Process to Plan Dining Area Light Fixtures
6. Match Lighting to Your Interior Style
What to Focus on When Choosing Dining Lighting
Choosing dining area light fixtures should start with function, then move to aesthetics. Your dining zone usually serves multiple purposes: eating, hosting, and social conversation. Each use benefits from a predictable light level, flattering color, and controlled glare.
1) Table visibility and face-friendly brightness
Lighting directly influences how people see each other at the table. Bright light from the wrong angle can create harsh shadows and make facial features look less natural. Prefer fixtures that distribute light downward or that bounce light softly off the ceiling. This improves clarity without glare.
2) Correct scale for the space
The size of your pendant, chandelier, or wall-mounted fixtures should relate to the table dimensions and ceiling height. Oversized fixtures often overwhelm the room and reduce balance. Undersized fixtures look disconnected and fail to illuminate the dining surface effectively.
3) Light distribution and coverage
Different fixture types spread light differently. Pendants and chandeliers typically provide a concentrated pool under the table. Recessed lights or track lighting can broaden coverage. Wall sconces add vertical highlights and reduce flatness.
4) Finish, material, and color temperature
Metal finishes, glass tones, and shade materials change how light looks in the room. Clear or bright glass can feel crisp, while opal or frosted options often feel gentle. For most dining rooms, a warm to neutral color temperature creates a comfortable atmosphere.

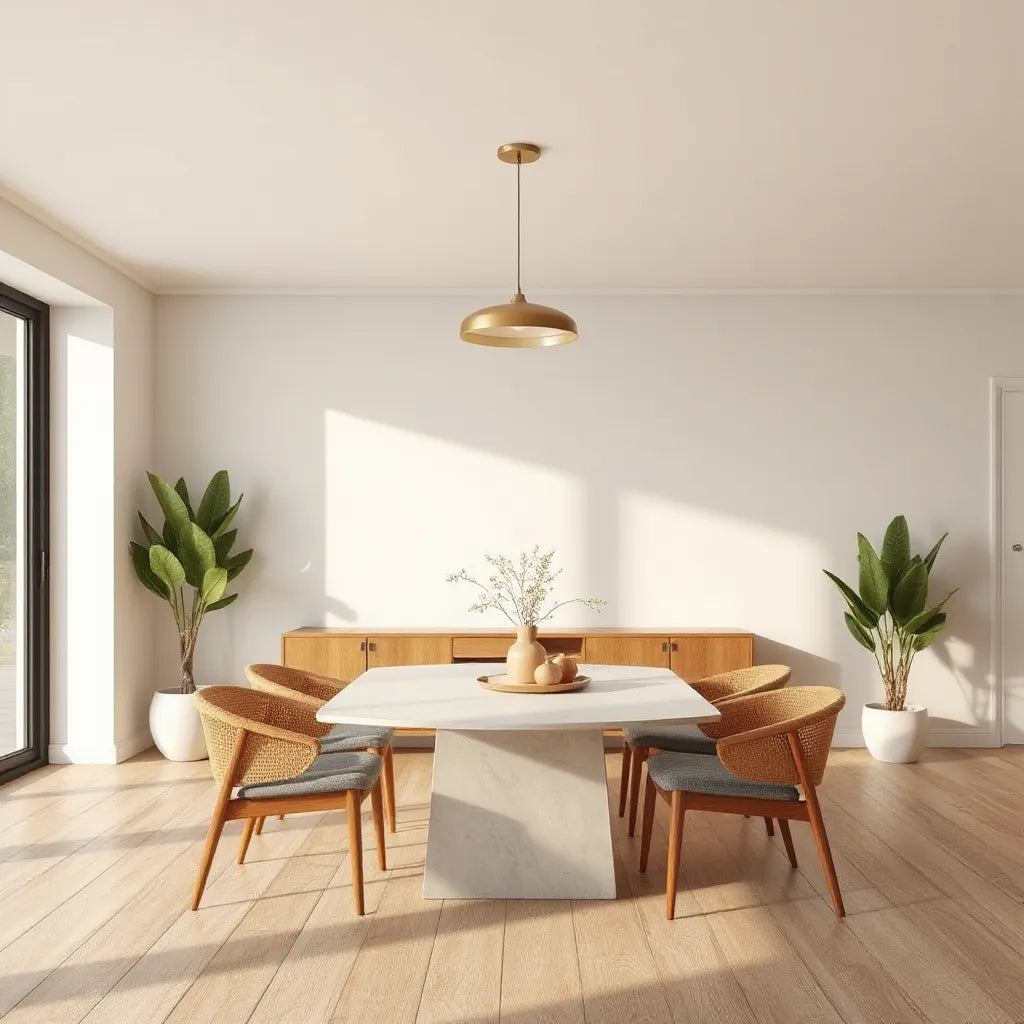
Warm light over a dining table, soft shadows
Common Mistakes to Avoid
Even high-quality fixtures can underperform when planning is rushed. Avoid these errors to protect both comfort and visual impact.
Ignoring ceiling height: Too low a suspension can feel cramped; too high reduces usable brightness on the table.
Relying on a single overhead source: One fixture can leave corners dim and faces unevenly lit.
Choosing incorrect brightness: Excessive brightness feels harsh, while insufficient output can force people to squint.
Overlooking glare and reflection: Glossy tabletops, mirrors, and polished floors can reflect light back into guests’ eyes.
Skipping dimmer control: Dining rooms often need flexibility for daytime meals versus evening hosting.
Selecting the wrong color rendering: Poor color accuracy can make food and walls appear washed out or unnatural.
Build a Layered Lighting Plan
Layered lighting creates depth and control. Instead of forcing every task onto one fixture, you distribute light across the room. A layered plan also makes the dining area feel more intentional and less dependent on one brightness level.
Ambient lighting for overall comfort
Ambient light sets the base level. This can come from a ceiling-mounted fixture, recessed lights, or a chandelier with diffused illumination. The goal is steady comfort, not dramatic contrast.
Task lighting over the dining surface
The table is the main work zone. Pendants, chandeliers, and linear fixtures can focus light where it matters. When the distribution is correct, guests can see food clearly and conversation stays comfortable.
Accent lighting for depth and atmosphere
Wall sconces, picture lights, or subtle toe-kick illumination add dimension. Accent light helps define architectural edges and reduces visual harshness in corners. It also supports a welcoming mood during evening gatherings.
To strengthen cohesion, choose finishes that relate to other hardware in the room, such as cabinet pulls or chair frames. Consistency does not mean everything must match exactly. It means the overall metal tones and visual weight should feel aligned.
Use Dimmers and Correct Bulb Selection
For dining spaces, lighting control is nearly as important as fixture selection. Dimmers allow you to adapt brightness to the occasion. With dimming, the same fixture can feel bright for cleaning, balanced for meals, and relaxed for hosting.
Color temperature: warm comfort with balanced neutrality
Many dining rooms benefit from warm tones that feel inviting. Warm lighting often enhances skin tone and makes wood finishes appear richer. If your space includes light walls and reflective surfaces, a slightly more neutral tone can prevent the room from looking overly yellow.
Brightness targets and fixture efficiency
Rather than focusing only on wattage, consider lumens and fixture efficiency. LED bulbs often provide similar brightness with lower energy usage. The key is achieving even illumination across the tabletop without creating a bright hotspot.
Color rendering for natural-looking food
Color rendering affects how accurately bulbs reproduce reds, greens, and warm tones. Dining rooms typically look best with high color rendering performance. While exact numbers depend on the bulb type, choosing bulbs identified for high color quality generally improves the overall look of meals.
If you are unsure, test bulbs in small quantities before committing to a full switch. Even a minor change in color temperature can alter the perceived warmth of dining area light fixtures.
Step-by-Step Process to Plan Dining Area Light Fixtures
A structured approach prevents costly rework. Use the steps below to plan a cohesive and comfortable lighting layout.
Step 1: Measure the dining zone
Record table length and width, ceiling height, and the distance between walls. Identify any large obstacles such as beams, ceiling fans, or ductwork that may affect fixture placement.
Step 2: Decide the fixture type for the table
Choose the main feature that supports the table. Options commonly include pendants, chandeliers, or a centered ceiling fixture with a diffuser. Select a style that matches your room’s visual weight and the scale of the dining area.
Step 3: Position the main fixture for balanced coverage
Center the fixture over the table unless your design calls for asymmetry. Aim for a comfortable hanging height that avoids head-level glare while still reaching the tabletop’s illumination zone.
Step 4: Add secondary light sources for evenness
Consider wall sconces or recessed lights to fill shadows. Secondary sources help when guests sit at different locations around the table. The result is fewer dark areas and more consistent brightness.
Step 5: Incorporate dimming control
Select a compatible dimmer and confirm it works with the chosen bulb type. Dimming enables a dining-ready mood without changing fixtures. It also extends comfort across seasons and daylight conditions.
Step 6: Verify reflected light and glare
Observe how light behaves at dinner time. Check for glare on glass surfaces, mirrored backsplashes, or glossy tabletops. When glare appears, adjust angles, add a diffusing shade, or improve shielding.
Step 7: Fine-tune with decorative details
Once illumination is correct, refine the visual layer. Coordinate metal finishes and shades with your chair materials, cabinet accents, and the overall color palette. Decorative lighting should support the room, not compete with it.
For a practical style reference, consider pairing lighting with modern seating and cabinetry tones. For example, if you have sculptural dining chairs, a chandelier or pendant with clean lines will typically align well.
Luna Light
 Shop Luna Light

Lighting layers: pendant above, wall accents, warm glow
Match Lighting to Your Interior Style
Dining lighting should reinforce your design direction. Style alignment improves perceived cohesion, even when you mix materials. The goal is consistent visual language: shape, finish, and shade characteristics.
Modern and minimalist dining rooms
Look for streamlined pendants, controlled silhouettes, and finishes such as matte metal. Minimalist spaces often benefit from diffused light to prevent harsh reflections. Maintain a clear hierarchy: one main statement fixture with secondary layers kept subtle.
Transitional dining spaces
Transitional interiors blend classic comfort with contemporary clarity. Choose fixtures that balance traditional proportions and updated materials. Frosted glass and gently curved arms typically perform well in these rooms.
Warm industrial aesthetics
Industrial dining rooms often feature exposed materials and robust textures. Lighting can echo this with metal frames and textured glass. To keep the space comfortable for meals, prioritize warm color temperatures and diffused distribution.
Scandinavian and light-forward designs
Scandinavian interiors tend to prioritize airy brightness and natural materials. Use warm-neutral color temperatures and shades that soften glare. Keep finishes light and coordinated so the dining area remains calm.
If you are also planning seating updates, chair shapes influence how people perceive spacing. You may find it useful to review related seating options on izumi chair details when matching chair tone and material expression to your lighting plan.
Maintenance and Long-Term Care
Dining area light fixtures collect dust and cooking-adjacent particles over time. Routine care preserves brightness and keeps finishes looking fresh. Maintenance is especially important for glass shades and diffusers.
Turn off power before cleaning: Always disconnect the fixture according to safe practice guidelines.
Use gentle cleaning methods: Microfiber cloths remove surface dust without scratching.
Clean glass or diffusers carefully: Use appropriate non-abrasive cleaners and avoid harsh chemicals that can cloud finishes.
Check for alignment: Over time, a fixture may shift. Ensure it remains centered and stable.
Replace bulbs before brightness drops: Some LEDs slowly lose output. Replacing them maintains consistent visual quality.
Good maintenance also protects the experience of hosting. When fixtures operate at peak performance, your dining lighting remains flattering and functional.
Q&A Section
How high should dining area light fixtures be installed over the table?
The correct height depends on ceiling height and the fixture type. As a general principle, you want the fixture low enough to illuminate the tabletop effectively, while high enough to prevent glare and head-level discomfort. If your room includes guests who prefer taller seating, leave slightly more clearance to maintain comfort.
What bulb characteristics matter most for dining rooms?
Color temperature, brightness, and color rendering are the most important factors. A warm to neutral color temperature often enhances comfort and skin tone. Color rendering performance supports natural-looking food colors. Brightness should be sufficient for tabletop visibility without creating harsh hotspots.
Do I need multiple fixtures, or is a single chandelier enough?
A single chandelier can work in smaller dining rooms, especially when it provides good diffusion and you use dimming. However, multiple layers are usually more flexible. Secondary lighting reduces shadows and helps the room look balanced from different seating positions.
How can I prevent glare from reflective tabletops or glass surfaces?
Glare prevention often requires both fixture selection and placement. Choose diffused shades that spread light gently. If glare persists, adjust fixture height, change bulb brightness, or add controlled secondary lighting to reduce contrast. Covering or repositioning reflective surfaces can also help.
About the Author
Nisu Home supports home styling and practical interior guidance with an emphasis on lighting harmony, furniture coordination, and durable design decisions. The author specializes in creating clear frameworks for selecting home elements that work together, with attention to usability and visual comfort. After years of refining product and layout recommendations, the team focuses on helping customers make confident choices. Thank you for reading, and may your dining space feel welcoming every day.
For more inspiration and product pairing ideas, you can explore collections at Nisu Home store.
Disclaimer: This article provides general guidance for home lighting planning. Always follow manufacturer instructions and local electrical codes when installing or modifying any lighting system. For specific compatibility questions, consult a qualified electrician or the fixture documentation.


Leave a comment
This site is protected by hCaptcha and the hCaptcha Privacy Policy and Terms of Service apply.