

Updated on: 2026-10-21
Stylish home lighting combines visual appeal with practical function. The right fixtures improve mood, support tasks, and make rooms feel cohesive. This guide shows how to choose the correct light color, brightness, and placement for each area. You will also find a simple method to plan layers of illumination and avoid common design errors.
1. Product Spotlight
2. Step-by-Step How-To
3. Personal Experience
4. Summary & Recommendations
5. Q&A Section
6. About the Author
Product Spotlight: Luna Light for Stylish Home Lighting
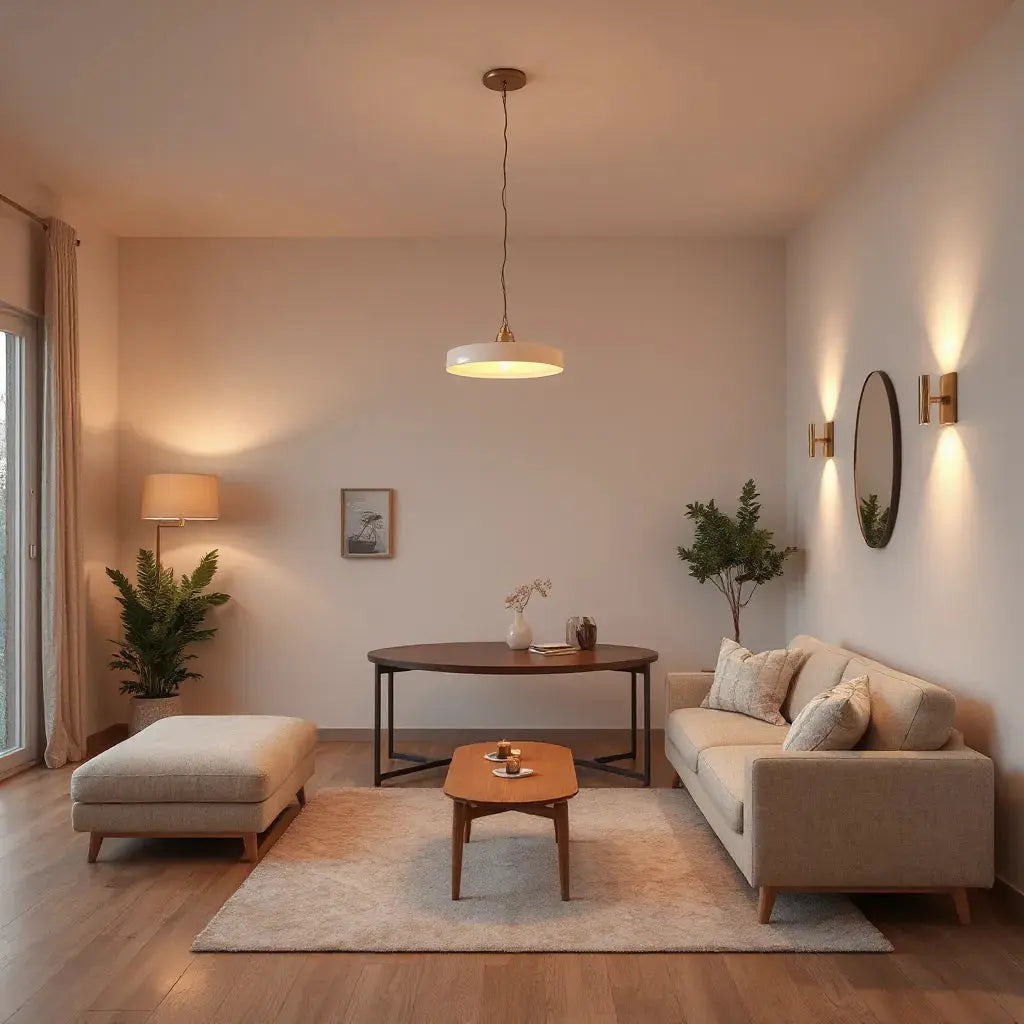
When people search for stylish home lighting, they usually want two outcomes at once: a refined look and dependable everyday performance. A well-designed fixture can elevate the room while also delivering the illumination you need for reading, relaxing, or hosting. One option worth considering is the Luna Light, which is designed to complement modern interiors through clean lines and a focused lighting presence.
Luna Light can serve as a centerpiece in a living room corner, a bedroom bedside area, or a hallway transition space. The key is that it supports layered lighting decisions. Instead of relying on a single overhead source, you can combine ambient, task, and accent lighting around one visually consistent element.

Layered lighting diagram with silhouettes and light gradients
To use Luna Light effectively, treat it as part of a system. Pair it with a complementary ceiling fixture or wall lighting to create depth. Then add dimmable accents where you want softer focus. This approach improves both appearance and comfort. It also makes the overall design feel intentional, even when you change bulbs or move furniture later.
Luna Light

Good stylish home lighting does not only look decorative. It reduces glare, improves visibility where tasks happen, and creates a stable visual rhythm between spaces. That is why placement matters as much as fixture style.
Step-by-Step How-To: Plan Stylish Home Lighting That Works
Use this structured method to design a lighting plan that is both attractive and functional. Each step is simple, but together they produce a more polished result.
-
Start with room goals. Identify what the room must do. A living room needs comfortable ambience for everyday use and brighter visibility for activities. A workspace requires sharper task lighting. A hallway benefits from consistent guidance and quick visual continuity.
-
Choose a light color temperature. Decide whether you want a warm, inviting tone or a more neutral, alert tone. Warm lighting typically supports relaxed evenings, while neutral lighting can feel clearer for daytime tasks. Keep the same temperature across connected zones to avoid a “patchwork” look.
-
Match brightness to surface and function. Brightness should rise when you need detail and clarity. Take note of wall color, ceiling height, and the amount of natural light. If a room has dark surfaces, it often needs more illumination than you expect.
-
Build layers: ambient, task, and accent. Ambient lighting provides general coverage. Task lighting supports specific activities such as reading or cooking. Accent lighting adds depth by highlighting artwork, architectural details, or textures. This layered method is one of the most reliable ways to achieve a stylish, high-end look.
-
Place fixtures where the eye benefits. Avoid direct glare facing seating or reading areas. For task lighting, aim light onto the working surface rather than into the eyes. For accents, use angled light to reveal texture instead of flattening it.
-
Use controls to shape the mood. Dimmer switches and compatible bulbs help you adapt brightness to time of day and activity. Even if you prefer a consistent style, adjustable levels make the room feel more comfortable.
-
Unify style details. Choose consistent finishes and design language across fixtures. The goal is cohesion, not repetition. For example, a matching metal tone across a table lamp, a wall light, and a ceiling fixture can make the room feel professionally composed.
When you follow this sequence, you reduce guesswork. You also make it easier to upgrade individual elements without redesigning the entire room.
Common mistakes to avoid
-
Over-reliance on a single ceiling fixture. One source often produces shadows and glare, especially in corners.
-
Ignoring scale. A small fixture can look out of place in a large room, while an oversized fixture can dominate the design.
-
Mixing light temperatures. Different temperatures across rooms can create an uncomfortable transition.
-
Skipping accent lighting. Without accents, rooms can feel flat even when brightness is adequate.
How to choose fixtures that look intentional
For stylish home lighting, selection should reflect both aesthetic and performance. Focus on fixture silhouettes, optical design, and finish durability. Also consider how the fixture appears when lights are off. Many people evaluate lighting only when it is operating, but the visual impact extends into daytime and evening.

Room zones with ambient, task, and accent light rays
A practical way to test your plan is to mock it using a simple flashlight approach. Move the beam across likely seating and work surfaces. If you see strong glare or harsh shadows, your future fixture placement will likely create similar issues. Then adjust the direction and distance conceptually before making purchases.
Personal Experience: What Changed My Approach
I used to design lighting by buying attractive fixtures and then finding “somewhere” to install them. The results were uneven. One corner looked polished, while another felt dim or visually cluttered. Shadows gathered near seating, and reading became uncomfortable because light direction did not match the task.
The turning point came when I stopped treating lighting as a collection of products and started treating it as a system of layers. I selected a consistent light color temperature for connected rooms, then planned ambient coverage first. After that, I added task lighting where activity required clarity. Only then did I incorporate accent light to highlight textures and create visual depth.
Once I approached the space this way, the design became easier to maintain. Moving furniture did not require a total lighting overhaul. The room still felt cohesive because the layers stayed consistent. This is why stylish home lighting often performs better when you plan placement and purpose before finalizing fixtures.
Summary & Recommendations
Stylish home lighting is not only about appearance. It is about how light interacts with surfaces, tasks, and daily routines. A reliable lighting plan uses layered illumination, consistent light color temperature, and careful placement to reduce glare and enhance comfort.
Recommendations to apply immediately:
-
Select a consistent light temperature across connected areas to maintain visual continuity.
-
Combine ambient, task, and accent layers to create depth and a more upscale look.
-
Use controls such as dimmers when you want flexible mood changes.
-
Evaluate how fixtures look when off to ensure cohesion in daylight.
If you are curating a consistent home aesthetic, you may also want to consider how lighting pairs with your furniture style. For example, seating and tables can influence how light reflects across surfaces. If you are updating your dining or lounge area, you can explore complementary design pieces such as Luna Light and other room elements on the same platform.
For additional context on coordinated interior styling, you can also review seating options like Izumi Chair or cabinetry accents such as Asuka Cabinet. Lighting, furniture, and finishing details work best when they support a shared design language.
Q&A Section
What does “stylish home lighting” include besides modern fixture designs?
Stylish home lighting includes correct brightness levels, suitable light color temperature, and thoughtful placement. It also includes glare control and the use of layers so rooms feel dimensional rather than flat. When lighting supports daily tasks and creates a consistent mood, the result looks both refined and functional.
How many light sources should a typical room have?
Most rooms benefit from at least three layers: ambient light for general visibility, task light for focused activities, and accent light for depth. In smaller spaces, you can combine these roles with multifunction fixtures, but the underlying goal remains the same: comfort plus visual interest.
Is it better to choose warm or neutral light for living areas?
Warm light typically supports relaxation and a cozy atmosphere. Neutral light often feels clearer for daytime activities and detail-oriented tasks. The most dependable strategy is to choose one temperature and keep it consistent in connected areas so transitions remain smooth.
How can I reduce glare when using stylish home lighting?
Reduce glare by aiming light onto surfaces rather than directly into eyes, using shades or diffusers when needed, and avoiding overly bright points in the field of view. Dimming controls also help because glare often increases when lights are set too high. Finally, consider how glossy surfaces reflect light and adjust fixture angles accordingly.
About the Author
Nisu Home focuses on interior styling and practical design guidance. The author team brings expertise in lighting planning, room composition, and everyday usability. If you want stylish home lighting that feels intentional and comfortable, Nisu Home provides clear recommendations and a design-first mindset. Thank you for reading.
Disclaimer: This article provides general guidance for home lighting design. Lighting performance depends on fixture specifications, room layout, surface finishes, and bulb selection. Always follow manufacturer instructions and consult a qualified professional for electrical work.

Leave a comment
This site is protected by hCaptcha and the hCaptcha Privacy Policy and Terms of Service apply.